
Nexus3管理maven
Nexus安装
java后端开发人员,对于maven应该不会陌生,对于一些优秀的jar,我们都可以在maven仓库当中找到,同时maven还提供各类插件进行项目级的编译、打包等工作。通过maven很大程度解决了我们对于包管理的问题。无论是使用外部库还是内部发布的jar包管理,基于nexus的maven私服为我们提供了这中管理功能。
安装方式见:Nexus3介绍与安装
创建仓库
登录之后可以点击页面上方的齿轮按钮按照下面的方法进行设置。
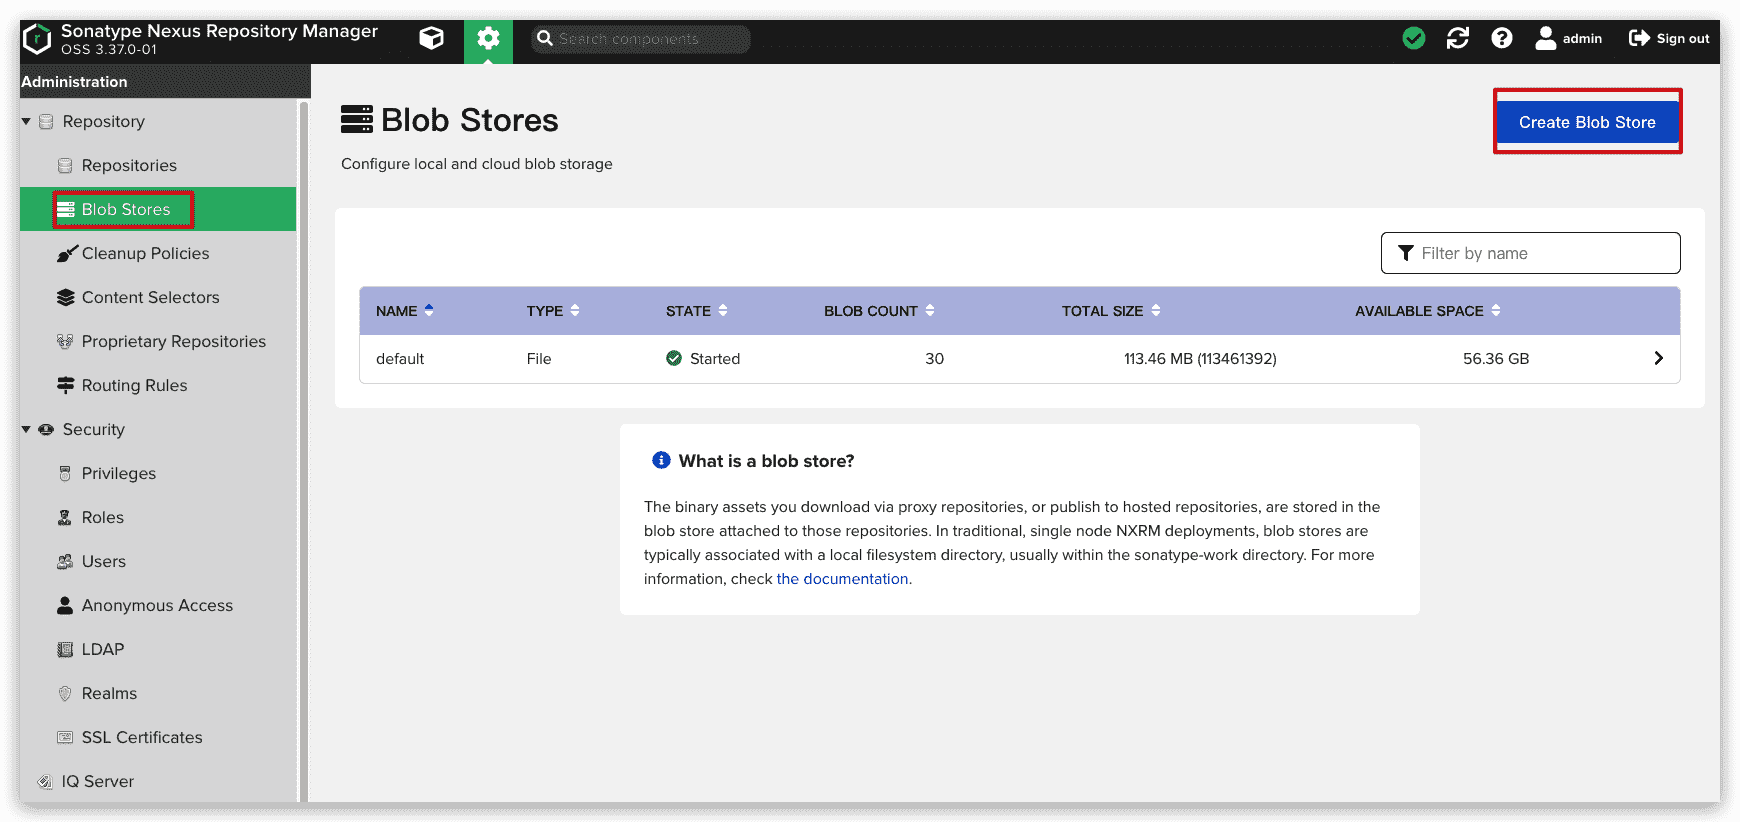
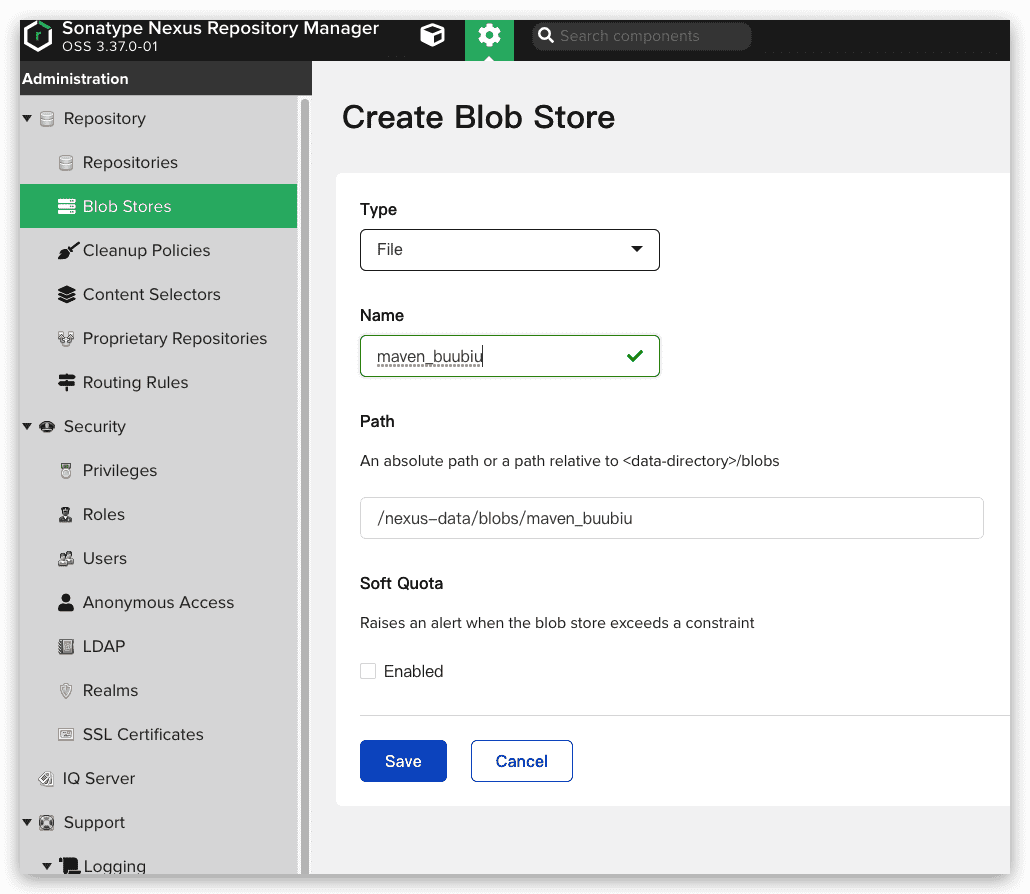
创建blob存储
首先创建一个blob存储,用以和其他的仓库进行区分开来,当然,也可以不创建
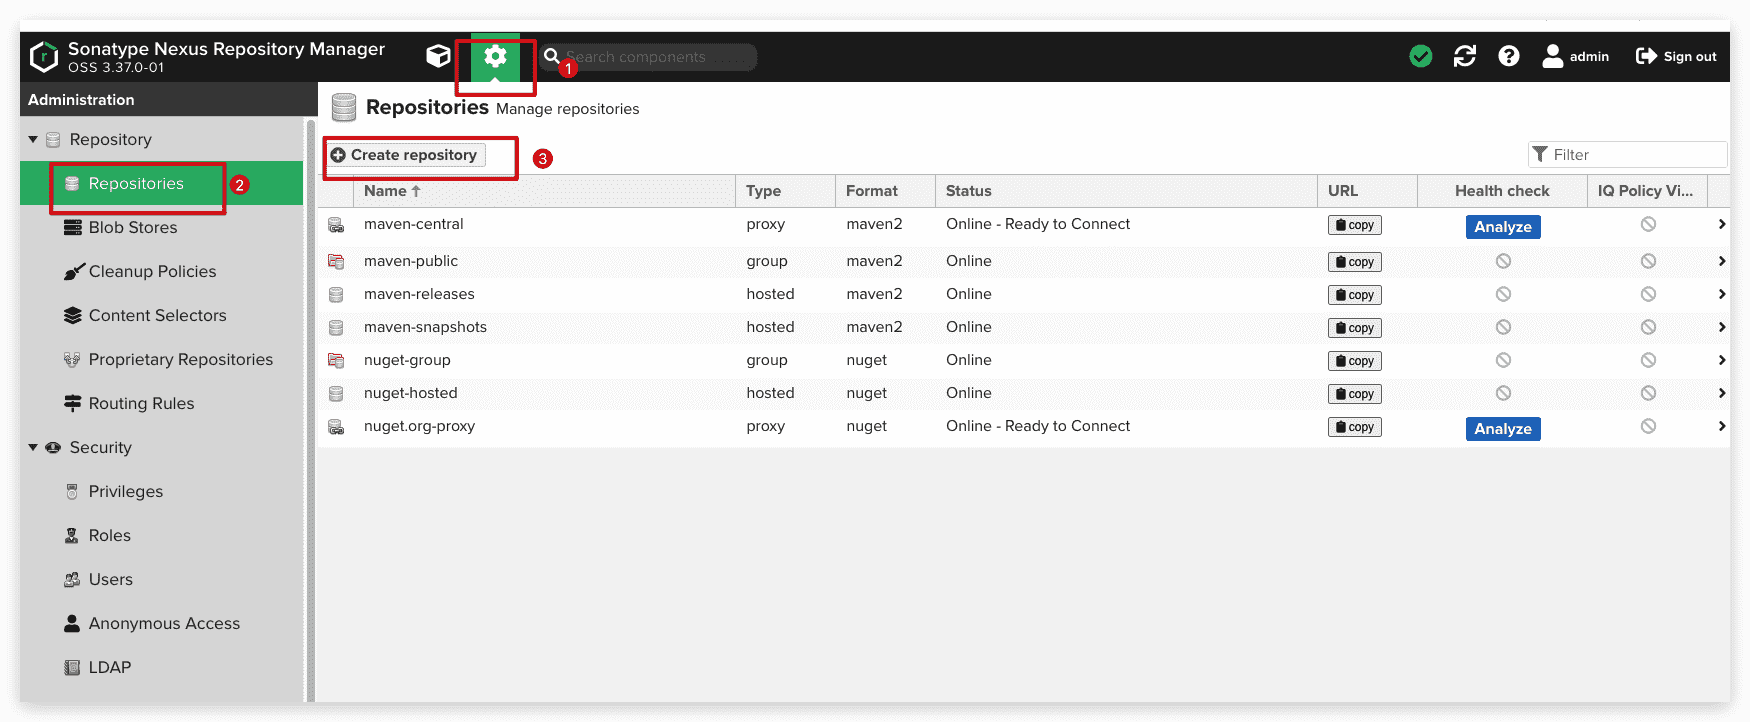
创建私有仓库
然后创建一个私有仓库的方法: Repository->Repositories 点击右边菜单 Create repository 选择 maven (hosted)
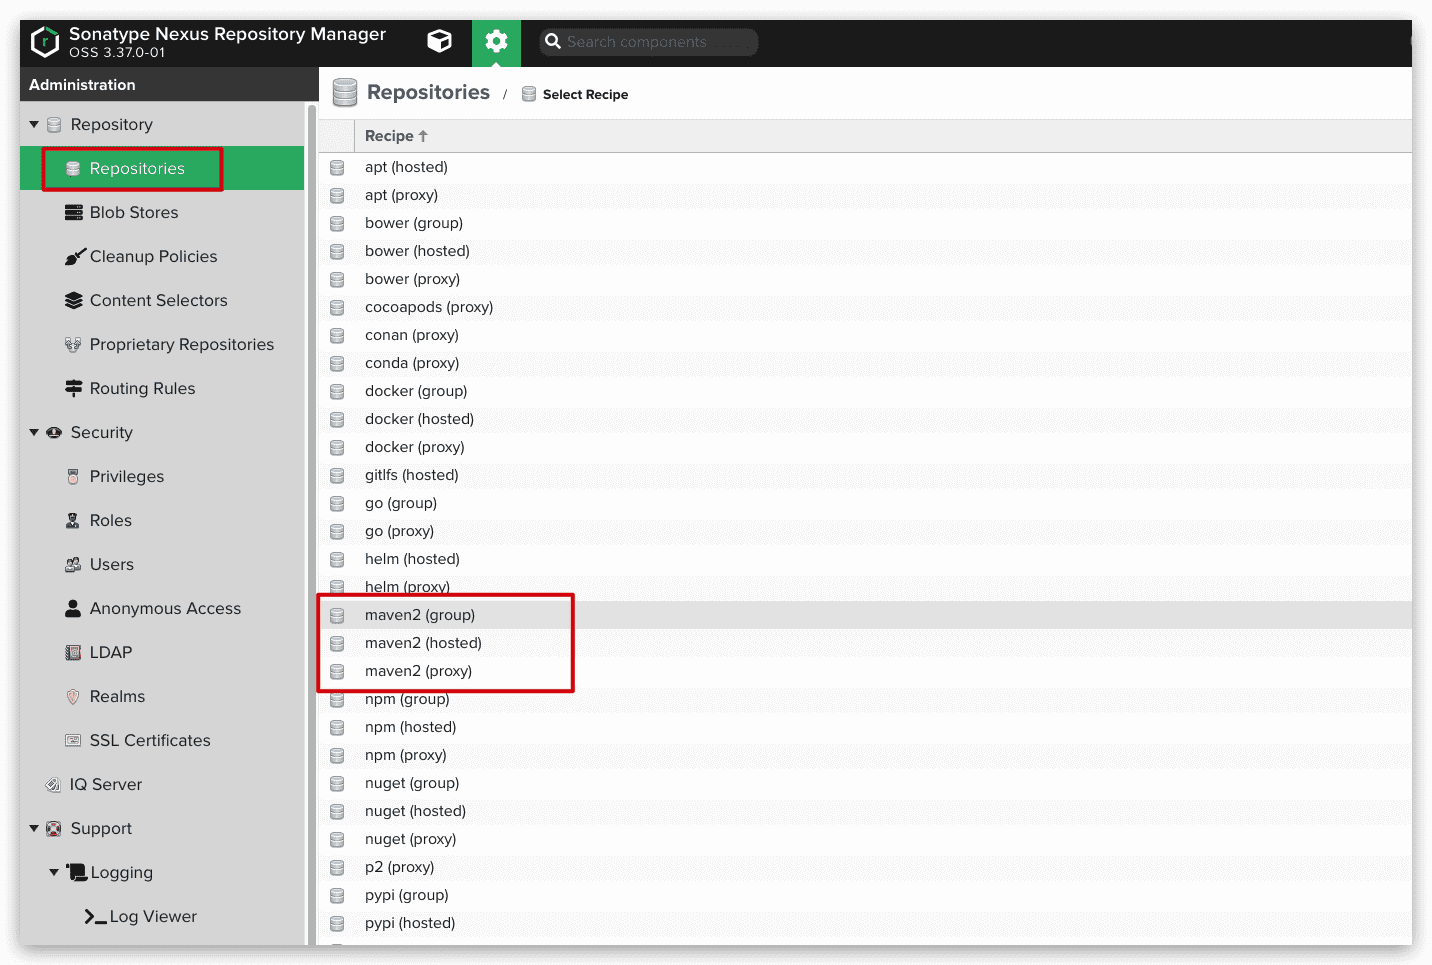
仓库区别:
maven2 (hosted)类型的仓库链接到私有仓库中的镜像maven2 (proxy)类型的仓库链接到 Maven公共仓库 或其他私服 上,并缓存到 Nexus 中maven2 (group)类型的仓库把刚才的hosted与proxy添加在一起,主机在访问的时候默认下载私有仓库中的jar包,如果没有将链接到 代理服 中下载并缓存到 Nexus 中。
举例:以 hosted 方式创建 snapshots release仓库
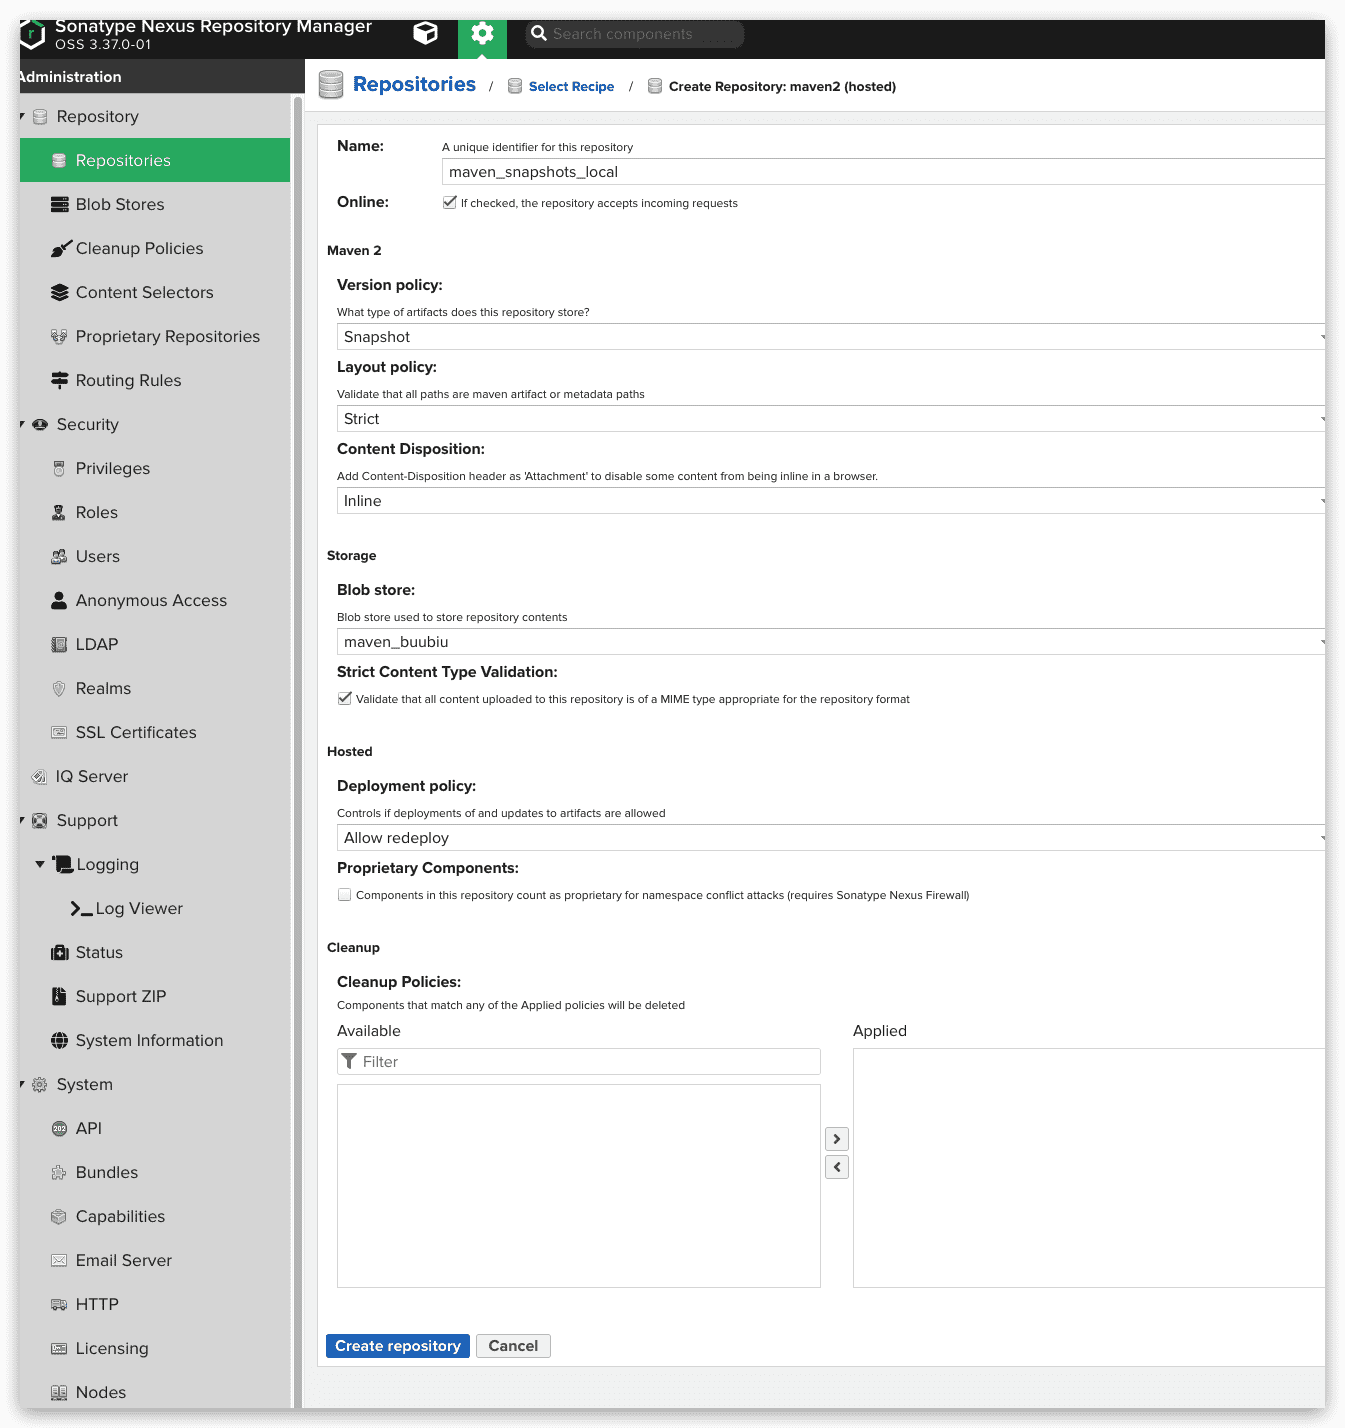
- Name: 仓库的名称
- Maven2.Version policy:仓库类型,这里可以选择 snapshots、releases
在pom.xml区别是:
1 | <version>1.0.0-SNAPSHOT</version> |
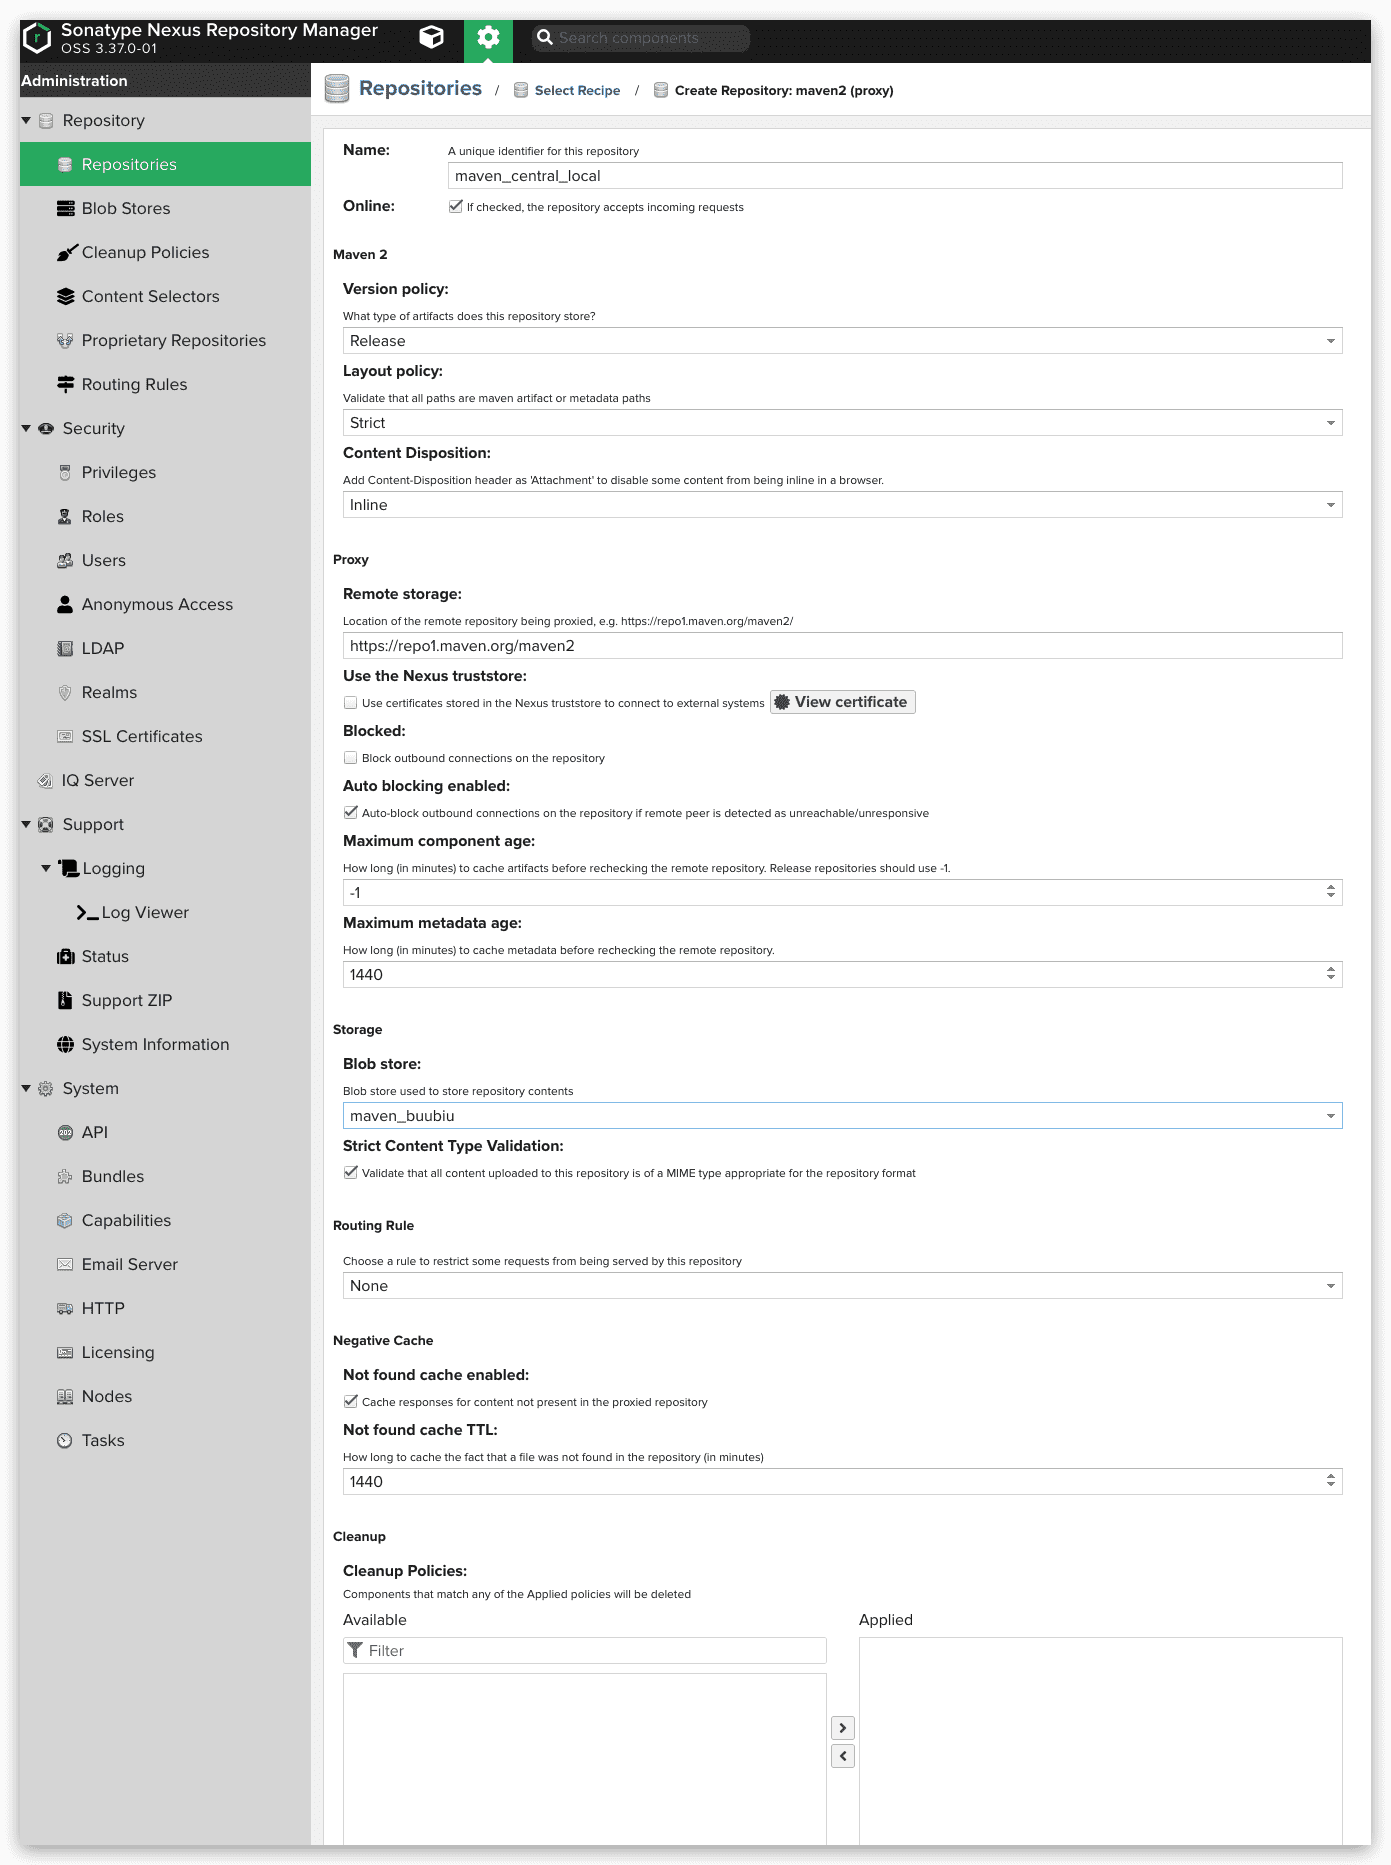
举例:以proxy方式代理maven中央仓库
举例:以group方式创建仓库
将上述所有存储进行分组,提供一个URL来配置到客户端pom文件中

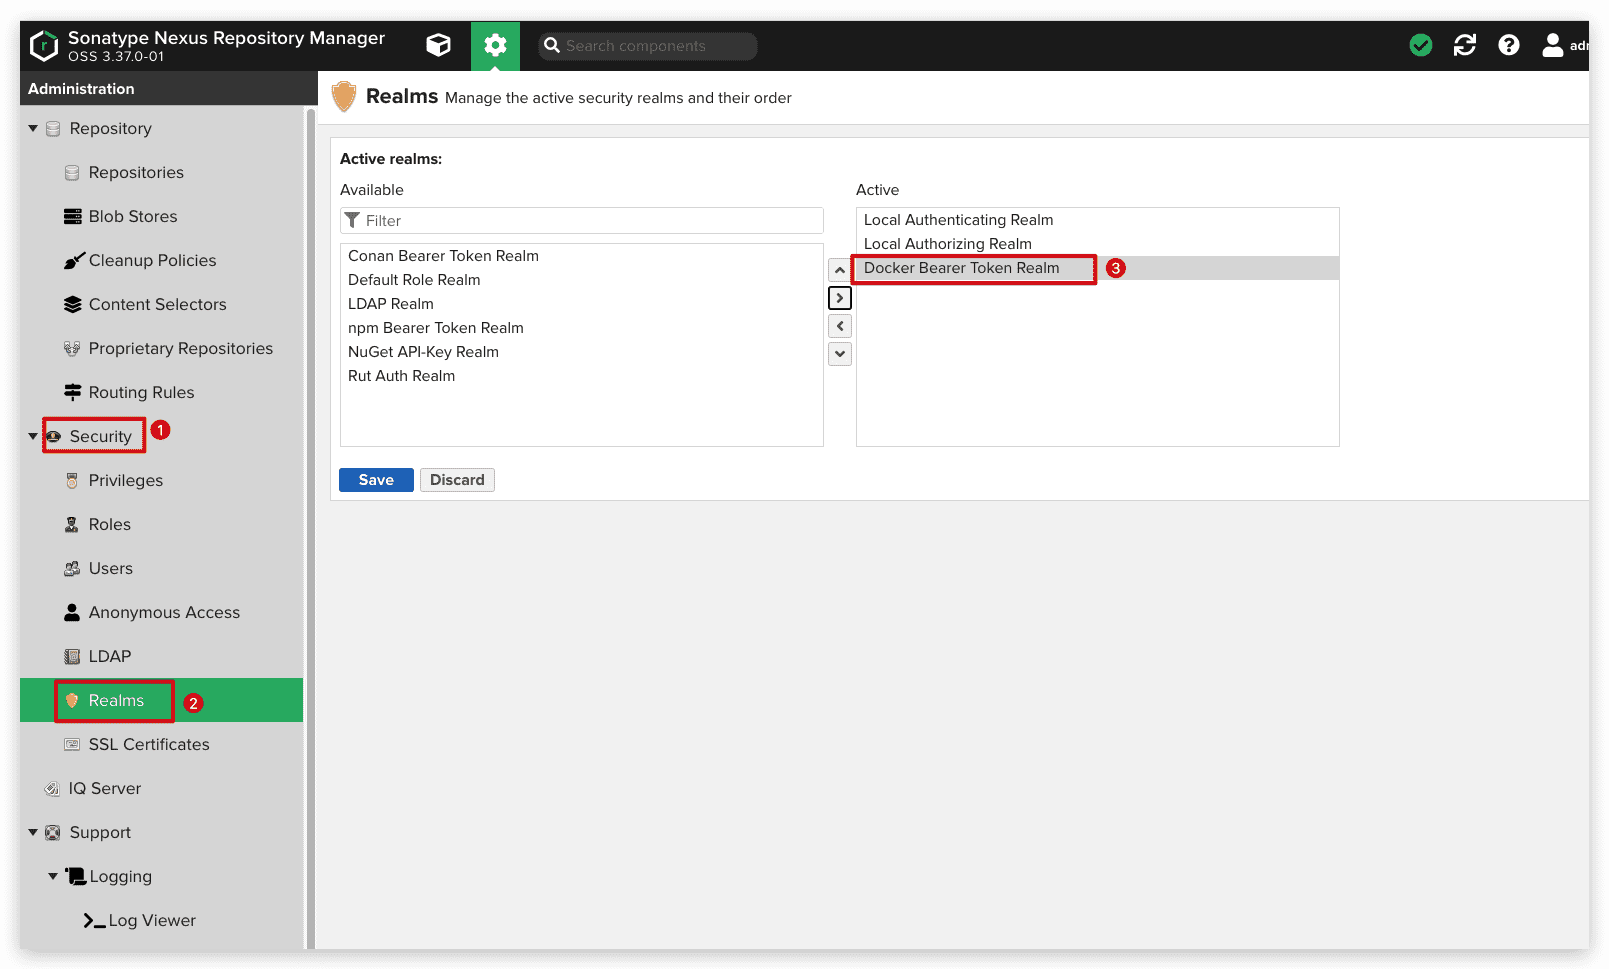
添加访问权限
菜单 Security->Realms 把 Docker Bearer Token Realm 移到右边的框中保存。
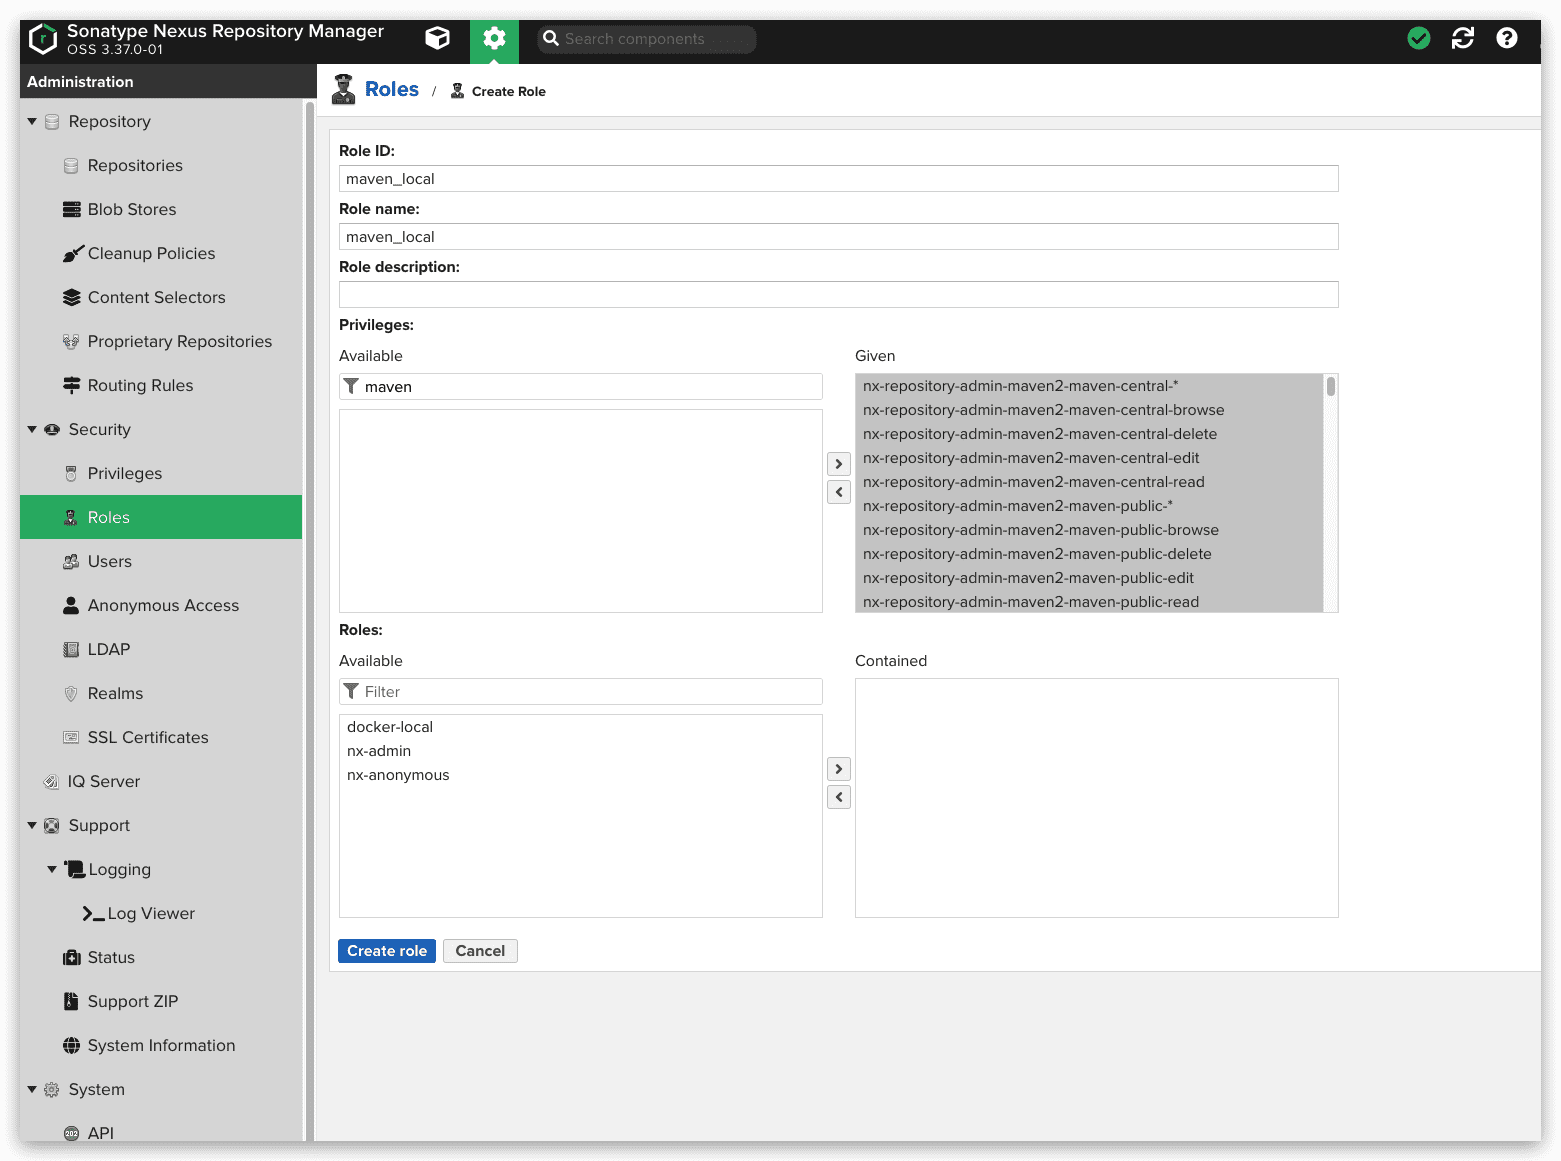
添加用户规则:菜单 Security->Roles->Create role 在 Privlleges 选项搜索 maven 把相应的规则移动到右边的框中然后保存。
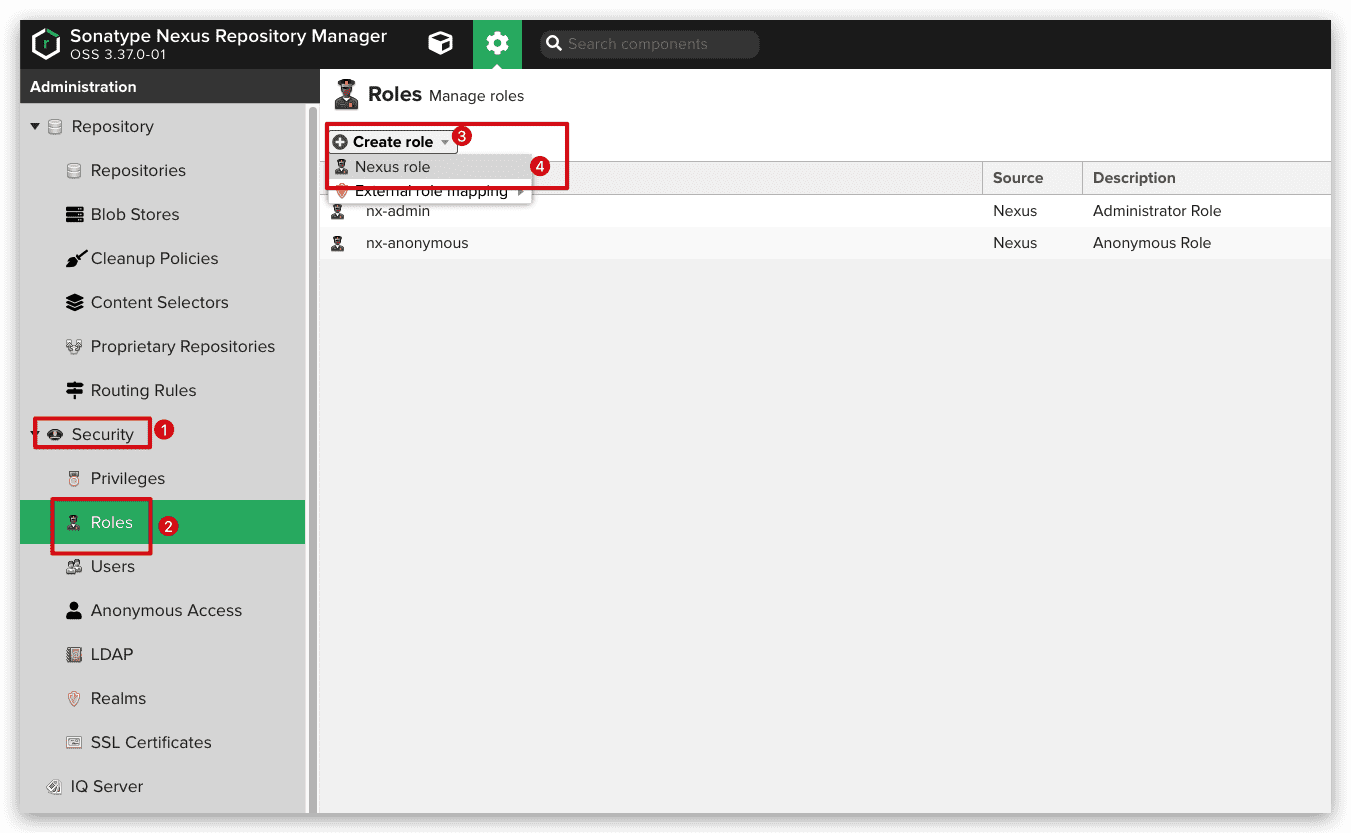
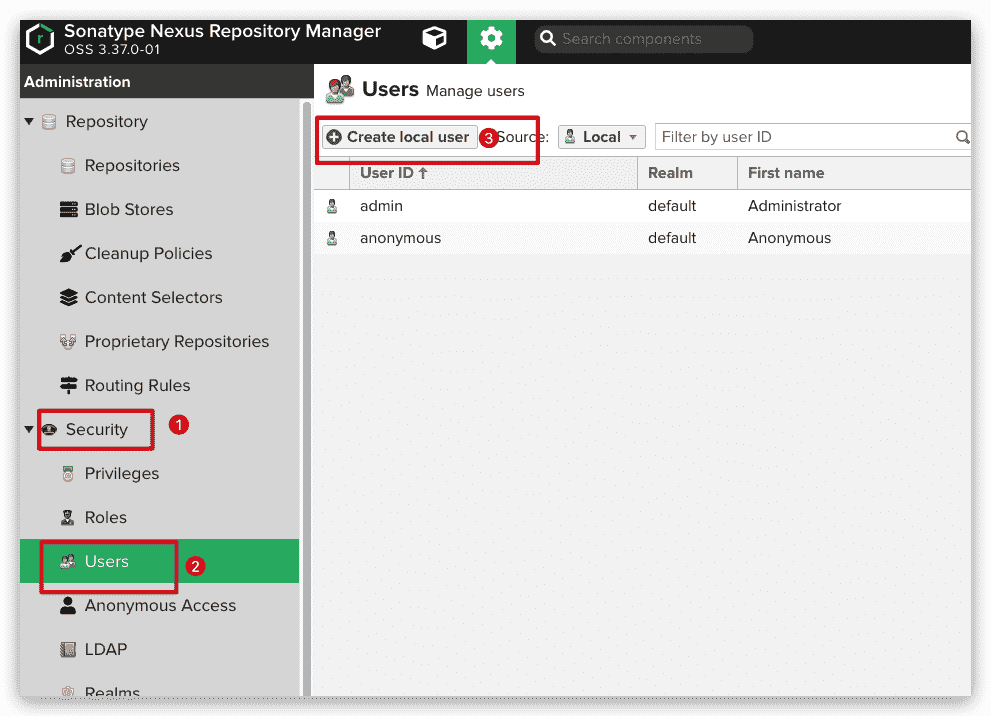
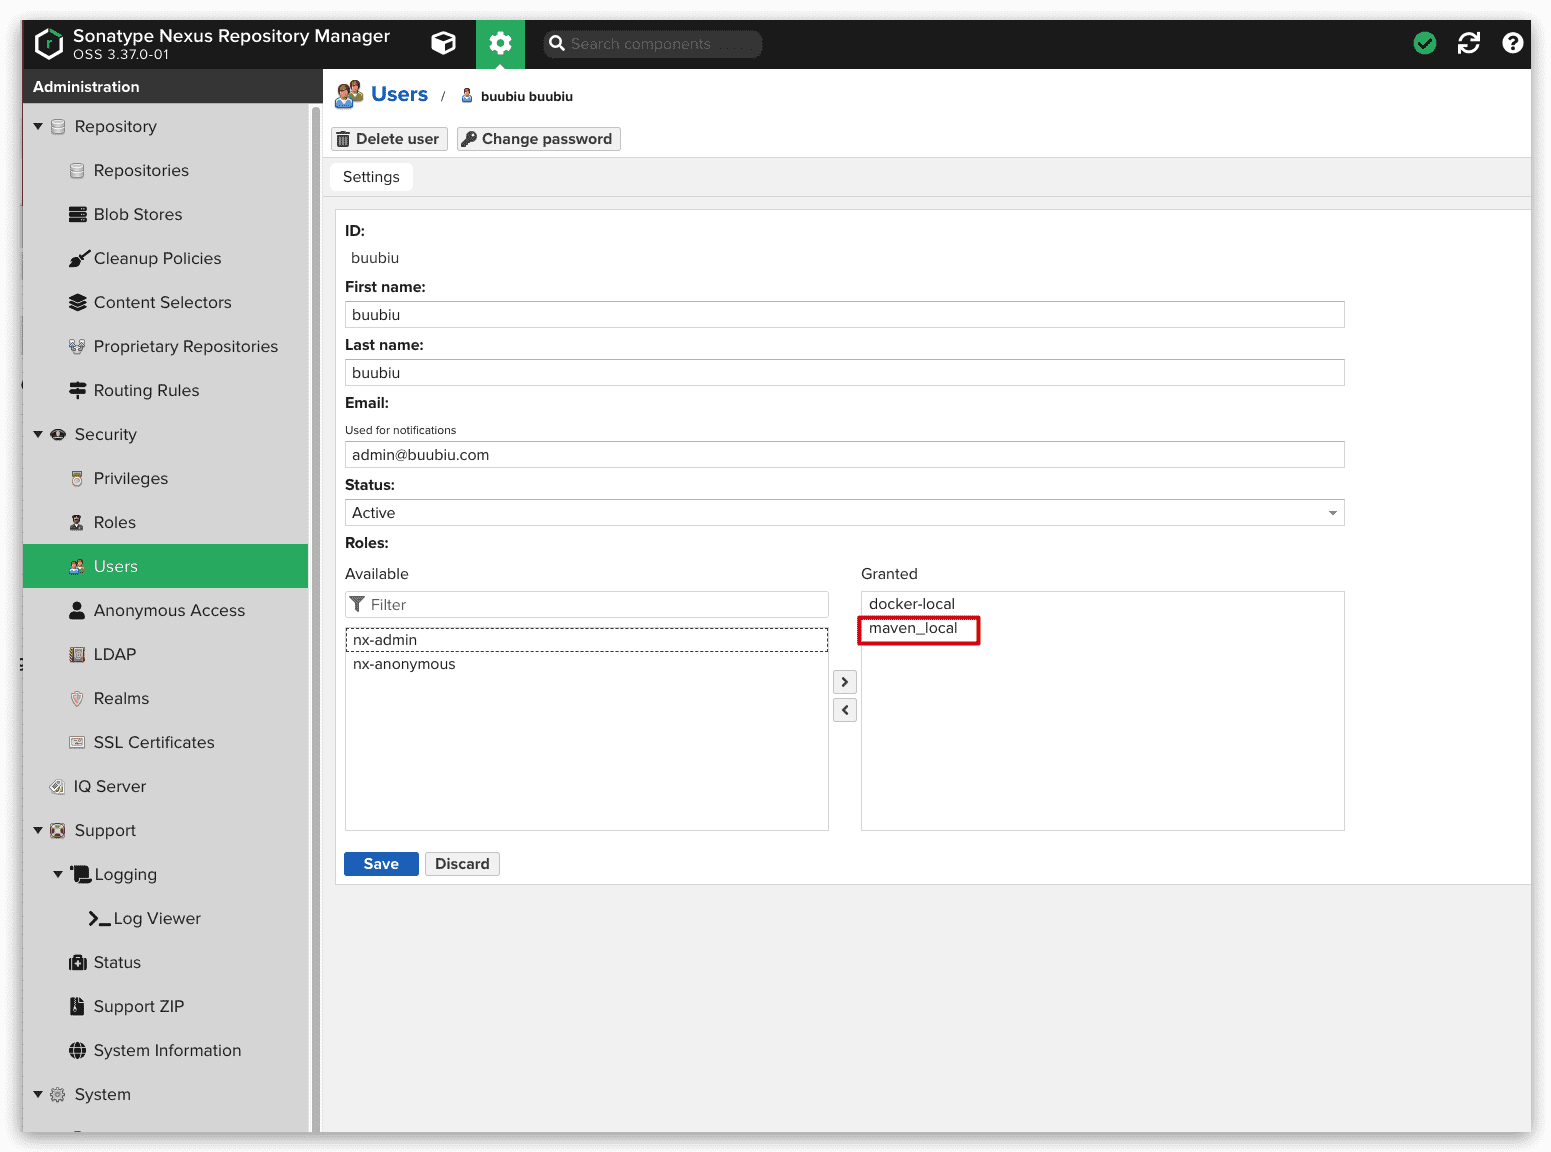
添加用户:菜单 Security->Users->Create local user 在 Roles 选项中选中刚才创建的规则移动到右边的窗口保存。
配置客户端和项目以使用Nexus Repos
修改配置文件
在
~/.m2/settings.xml中配置,适用于所有项目1
2
3
4
5
6
7
8
9
10
11
12
13
14
15
16
17
18
19
20
21
22
23
24
25
26
27
28
29
30
31
32
33
34
35
36
37
38
39
40
41
42
43
44
45
46
47
48
49
50
51
52
53
54
55
56
57
58
<settings xmlns="http://maven.apache.org/SETTINGS/1.1.0"
xmlns:xsi="http://www.w3.org/2001/XMLSchema-instance"
xsi:schemaLocation="http://maven.apache.org/SETTINGS/1.1.0 http://maven.apache.org/xsd/settings-1.1.0.xsd">
<servers>
<server>
<id>nexus-group-local</id>
<username>buubiu</username>
<password>buubiu</password>
</server>
</servers>
<profiles>
<profile>
<!--此id会在idea里面显示,供开发者选择激活-->
<id>profile-nexus-group-local</id>
<!--一般的远程仓库-->
<repositories>
<repository>
<!--此id要与上面server的id对应,才会用配置的用户密码-->
<id>nexus-group-local</id>
<name>nexus-group-local</name>
<url>http://your-host:8081/repository/maven_group_local/</url>
<layout>default</layout>
<releases>
<enabled>true</enabled>
<!--表示更新的频率,值有:never, always,interval,daily, daily 为默认值-->
<updatePolicy>always</updatePolicy>
</releases>
<snapshots>
<enabled>true</enabled>
<!--表示更新的频率,值有:never, always,interval,daily, daily 为默认值-->
<updatePolicy>always</updatePolicy>
</snapshots>
</repository>
</repositories>
<!--下载插件的仓库-->
<pluginRepositories>
<pluginRepository>
<id>nexus-group-local</id>
<name>nexus-group-local</name>
<url>http://your-host:8081/repository/maven_group_local/</url>
<layout>default</layout>
<snapshots>
<enabled>true</enabled>
</snapshots>
<releases>
<enabled>true</enabled>
</releases>
</pluginRepository>
</pluginRepositories>
</profile>
</profiles>
</settings>如果想在一个项目里面用,就只单独配置
pom.xml1
2
3
4
5
6
7
8
9
10
11<project ...>
...
<repositories>
<repository>
<id>nexus-group-local</id>
<url>http://your-host:8081/repository/maven_group_local/</url>
</repository>
</repositories>
</project>如果想发布项目也是分两种情况
适用于所有项目,在
~/.m2/settings.xml中配置1
2
3
4
5
6
7
8
9
10
11
12
13
14
15
16
17<setting>
...
<profile>
<id>profile-nexus-group-local-deploy</id>
<properties>
<altSnapshotDeploymentRepository>
nexus-group-local::default::http://your-host:8081/repository/maven_snapshot_local/
</altSnapshotDeploymentRepository>
<altReleaseDeploymentRepository>
nexus-group-local::default::http://your-host:8081/repository/maven_release_local/
</altReleaseDeploymentRepository>
</properties>
</profile>
</profiles>
</settings>如果想单独配置,配置
pom.xml即可1
2
3
4
5
6
7
8
9
10
11
12
13
14
15<project>
...
<distributionManagement>
<snapshotRepository>
<id>nexus-group-local</id>
<url>http://your-host:8081/repository/maven_snapshot_local/</url>
</snapshotRepository>
<repository>
<id>nexus-group-local</id>
<url>http://your-host:8081/repository/maven_release_local/</url>
</repository>
</distributionManagement>
</project>
编译运行打包
1 | $ mvn clean install -Dmaven.test.skip=true -P profile-nexus-group-local |
Nexus3管理maven