微信小程序框架组件-画布组件

canvas 组件

基础库 1.0.0 开始支持,低版本需做兼容处理

画布,我们可以做一些绘图和动画效果。2.9.0 起支持一套新 Canvas 2D 接口(需指定 type 属性),同时支持同层渲染,原有接口不再维护。相关api:获取 canvas 实例

属性 类型 默认值 必填 说明 最低版本
type string 指定 canvas 类型,支持 2d (2.9.0) 和 webgl (2.7.0) 2.7.0
canvas-id string canvas 组件的唯一标识符,若指定了 type 则无需再指定该属性 1.0.0
disable-scroll boolean false 当在 canvas 中移动时且有绑定手势事件时,禁止屏幕滚动以及下拉刷新 1.0.0
bindtouchstart eventhandle 手指触摸动作开始 1.0.0
bindtouchmove eventhandle 手指触摸后移动 1.0.0
bindtouchend eventhandle 手指触摸动作结束 1.0.0
bindtouchcancel eventhandle 手指触摸动作被打断,如来电提醒,弹窗 1.0.0
bindlongtap eventhandle 手指长按 500ms 之后触发,触发了长按事件后进行移动不会触发屏幕的滚动 1.0.0
binderror eventhandle 当发生错误时触发 error 事件,detail = {errMsg} 1.0.0

Bug & Tip

  1. tip:canvas 标签默认宽度300px、高度150px
  2. tip:同一页面中的 canvas-id 不可重复,如果使用一个已经出现过的 canvas-id,该 canvas 标签对应的画布将被隐藏并不再正常工作
  3. tip:请注意原生组件使用限制
  4. tip:开发者工具中默认关闭了 GPU 硬件加速,可在开发者工具的设置中开启“硬件加速”提高 WebGL 的渲染性能
  5. tip: WebGL 支持通过 getContext(‘webgl’, { alpha: true }) 获取透明背景的画布
  6. tip: Canvas 2D(新接口)需要显式设置画布宽高,默认:300*150,最大:1365*1365
  7. bug: 避免设置过大的宽高,在安卓下会有crash的问题
  8. tip: iOS 暂不支持 pointer-events

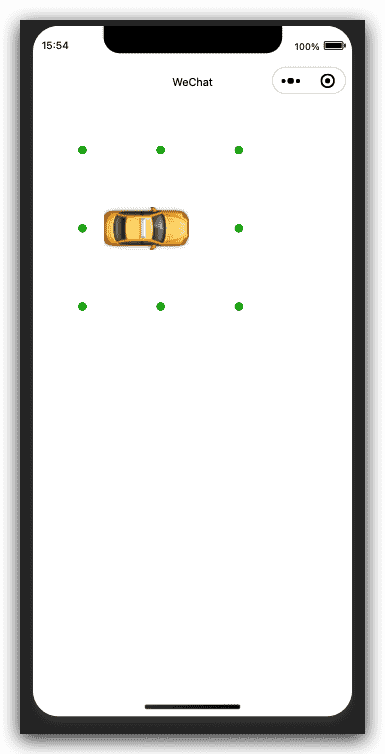
Canvas 2D 示例代码

在开发者工具中预览效果

index.wxml
1
2
3
4
5
<canvas
type="2d"
id="canvas"
style="width: 300px; height: 300px;"
></canvas>
index.js
1
2
3
4
5
6
7
8
9
10
11
12
13
14
15
16
17
18
19
20
21
22
23
24
25
26
27
28
29
30
31
32
33
34
35
36
37
38
39
40
41
42
43
44
45
46
47
48
49
50
51
52
53
54
55
56
57
58
59
60
61
62
63
64
65
66
67
68
69
70
71
72
73
74
75
76
77
78
79
80
81
82
83
84
85
86
87
88
89
90
91
92
93
94
95
96
97
98
99
100
101
const app = getApp()

Page({
data: {},

onLoad: function () {
this.position = {
x: 150,
y: 150,
vx: 2,
vy: 2
}
this.x = -100

// 通过 SelectorQuery 获取 Canvas 节点
wx.createSelectorQuery()
.select('#canvas')
.fields({
node: true,
size: true,
})
.exec(this.init.bind(this))
},

init(res) {
const width = res[0].width
const height = res[0].height

const canvas = res[0].node
const ctx = canvas.getContext('2d')

const dpr = wx.getSystemInfoSync().pixelRatio
canvas.width = width * dpr
canvas.height = height * dpr
ctx.scale(dpr, dpr)

const renderLoop = () => {
this.render(canvas, ctx)
canvas.requestAnimationFrame(renderLoop)
}
canvas.requestAnimationFrame(renderLoop)

const img = canvas.createImage()
img.onload = () => {
this._img = img
}
img.src = './car.png'
},

render(canvas, ctx) {
ctx.clearRect(0, 0, 300, 300)
this.drawBall(ctx)
this.drawCar(ctx)
},

drawBall(ctx) {
const p = this.position
p.x += p.vx
p.y += p.vy
if (p.x >= 300) {
p.vx = -2
}
if (p.x <= 7) {
p.vx = 2
}
if (p.y >= 300) {
p.vy = -2
}
if (p.y <= 7) {
p.vy = 2
}

function ball(x, y) {
ctx.beginPath()
ctx.arc(x, y, 5, 0, Math.PI * 2)
ctx.fillStyle = '#1aad19'
ctx.strokeStyle = 'rgba(1,1,1,0)'
ctx.fill()
ctx.stroke()
}

ball(p.x, 150)
ball(150, p.y)
ball(300 - p.x, 150)
ball(150, 300 - p.y)
ball(p.x, p.y)
ball(300 - p.x, 300 - p.y)
ball(p.x, 300 - p.y)
ball(300 - p.x, p.y)
},

drawCar(ctx) {
if (!this._img) return
if (this.x > 350) {
this.x = -100
}
ctx.drawImage(this._img, this.x++, 150 - 25, 100, 50)
ctx.restore()
}
})

WebGL 示例代码

在开发者工具中预览效果

index.wxml
1
<canvas type="webgl" id="myCanvas" style="width: 300px; height: 300px;"></canvas>
index.js
1
2
3
4
5
6
7
8
9
10
11
12
13
14
15
16
17
18
19
20
21
22
23
24
25
26
27
28
29
30
31
32
33
34
35
36
37
38
39
40
41
42
43
44
45
46
47
48
49
50
51
52
53
54
55
56
57
58
59
60
61
62
63
64
65
66
67
68
69
70
71
72
73
74
75
76
77
78
79
80
81
82
83
84
85
86
87
88
89
90
91
92
93
94
const vs = `
precision mediump float;

attribute vec2 vertPosition;
attribute vec3 vertColor;
varying vec3 fragColor;

void main() {
gl_Position = vec4(vertPosition, 0.0, 1.0);
fragColor = vertColor;
}
`

const fs = `
precision mediump float;

varying vec3 fragColor;
void main() {
gl_FragColor = vec4(fragColor, 1.0);
}
`

const triangleVertices = [
0.0, 0.5, 1.0, 1.0, 0.0,
-0.5, -0.5, 0.7, 0.0, 1.0,
0.5, -0.5, 0.1, 1.0, 0.6
];

Page({
onLoad() {
const query = wx.createSelectorQuery()
query.select('#myCanvas').node().exec((res) => {
const canvas = res[0].node
this._render(canvas)
})
},

_render(canvas) {
const gl = canvas.getContext('webgl')
if (!gl) {
console.error('gl init failed', gl)
return
}
gl.viewport(0, 0, 300, 300)
const vertShader = gl.createShader(gl.VERTEX_SHADER)
gl.shaderSource(vertShader, vs)
gl.compileShader(vertShader)

const fragShader = gl.createShader(gl.FRAGMENT_SHADER)
gl.shaderSource(fragShader, fs)
gl.compileShader(fragShader)

const prog = gl.createProgram()
gl.attachShader(prog, vertShader)
gl.attachShader(prog, fragShader)
gl.deleteShader(vertShader)
gl.deleteShader(fragShader)
gl.linkProgram(prog)
gl.useProgram(prog)

const draw = () => {
const triangleVertexBufferObject = gl.createBuffer()
gl.bindBuffer(gl.ARRAY_BUFFER, triangleVertexBufferObject)
gl.bufferData(gl.ARRAY_BUFFER, new Float32Array(triangleVertices), gl.STATIC_DRAW)

const positionAttribLocation = gl.getAttribLocation(prog, 'vertPosition')
const colorAttribLocation = gl.getAttribLocation(prog, 'vertColor')
gl.vertexAttribPointer(
positionAttribLocation,
2,
gl.FLOAT,
gl.FALSE,
5 * Float32Array.BYTES_PER_ELEMENT,
0
)
gl.vertexAttribPointer(
colorAttribLocation,
3,
gl.FLOAT,
gl.FALSE,
5 * Float32Array.BYTES_PER_ELEMENT,
2 * Float32Array.BYTES_PER_ELEMENT
)

gl.enableVertexAttribArray(positionAttribLocation)
gl.enableVertexAttribArray(colorAttribLocation)
gl.drawArrays(gl.TRIANGLES, 0, 3)
canvas.requestAnimationFrame(draw)
}

canvas.requestAnimationFrame(draw)
}
})

(可惜报错了,无法运行,等待官方修复)

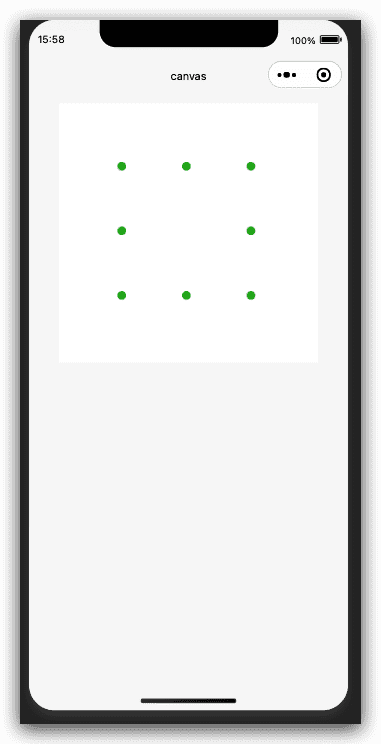
示例代码(旧的接口)

在开发者工具中预览效果

index.wxml
1
2
3
4
5
<view class="page-body">
<view class="page-body-wrapper">
<canvas canvas-id="canvas" class="canvas"></canvas>
</view>
</view>
index.js
1
2
3
4
5
6
7
8
9
10
11
12
13
14
15
16
17
18
19
20
21
22
23
24
25
26
27
28
29
30
31
32
33
34
35
36
37
38
39
40
41
42
43
44
45
46
47
48
49
50
51
52
53
54
55
56
57
58
59
Page({
onReady: function () {
this.position = {
x: 150,
y: 150,
vx: 2,
vy: 2
}

this.drawBall()
this.interval = setInterval(this.drawBall, 17)
},
drawBall: function () {
var p = this.position
p.x += p.vx
p.y += p.vy
if (p.x >= 300) {
p.vx = -2
}
if (p.x <= 7) {
p.vx = 2
}
if (p.y >= 300) {
p.vy = -2
}
if (p.y <= 7) {
p.vy = 2
}

var context = wx.createContext()

function ball(x, y) {
context.beginPath(0)
context.arc(x, y, 5, 0, Math.PI * 2)
context.setFillStyle('#1aad19')
context.setStrokeStyle('rgba(1,1,1,0)')
context.fill()
context.stroke()
}

ball(p.x, 150)
ball(150, p.y)
ball(300 - p.x, 150)
ball(150, 300 - p.y)
ball(p.x, p.y)
ball(300 - p.x, 300 - p.y)
ball(p.x, 300 - p.y)
ball(300 - p.x, p.y)

wx.drawCanvas({
canvasId: 'canvas',
actions: context.getActions()
})
},
onUnload: function () {
clearInterval(this.interval)
}
})

作者

buubiu

发布于

2021-11-12

更新于

2024-01-25

许可协议